Your roof and gutters do more than just keep your home looking good—they protect it from costly damage. But if moss, dirt, and clogged gutters are left unchecked, they can turn into serious problems. Moss traps moisture, which weakens shingles and speeds up roof decay. Clogged gutters cause water to overflow, leading to leaks, foundation issues, and even pest infestations.
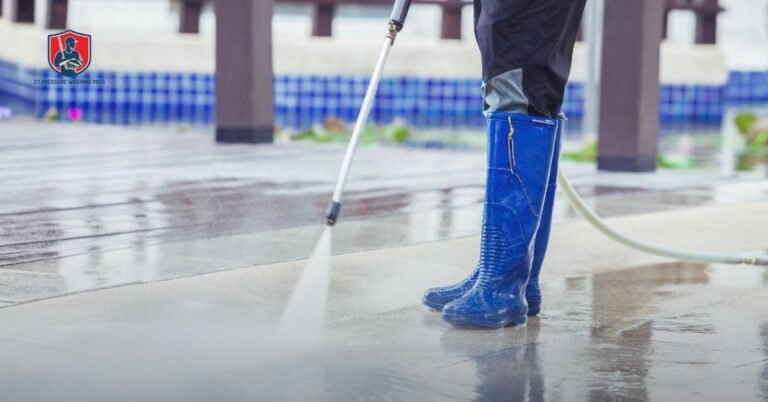
Regular roof and gutter cleaning keeps your home safe, prevents expensive repairs, and extends the life of your roofing system. But the wrong cleaning method can do more harm than good. High-pressure washing, harsh chemicals, and improper techniques can strip shingles of protective granules, leading to premature wear. So, how do you clean your roof and gutters the right way, without damaging them?
This guide breaks down the safest and most effective ways to remove moss, prevent buildup, and keep your gutters flowing freely. Whether you’re thinking about a DIY approach or hiring a professional, you’ll learn exactly what to do, when to do it, and what to avoid. Let’s get started.
Table of Contents
Safe Roof Cleaning Methods: Protecting Your Home & Health
Cleaning your roof the wrong way can do more harm than good. High-pressure washing strips away protective layers, while harsh chemicals can damage shingles and kill surrounding plants. The key is to use a gentle but effective method that removes dirt, moss, and algae without weakening your roof. Here is a Step-by-Step Guide to Safe Roof Cleaning.

Step 1: Gather the Right Equipment
- Safety first – Use a sturdy ladder, non-slip shoes, and a harness if working on a steep roof.
- Cleaning supplies – A garden sprayer, soft-bristle brush, and biodegradable roof cleaner.
- Hose with a spray nozzle – Avoid pressure washers, as they can loosen shingles.
Step 2: Check the Weather
- Pick a dry day with little wind to prevent slips and ensure the cleaner has time to work.
- Avoid cleaning on extremely hot days, as the solution may evaporate too quickly.
Step 3: Remove Loose Debris
- Use a leaf blower or soft broom to clear off leaves, sticks, and loose dirt.
- Never scrape or aggressively brush shingles—this can cause damage.
Step 4: Apply a Safe Cleaning Solution
- Mix a mild roof cleaner with water in a garden sprayer.
- Spray evenly, starting at the bottom and working your way up (this prevents streaks).
- Let the solution sit for 15-20 minutes to break down moss, algae, and grime.
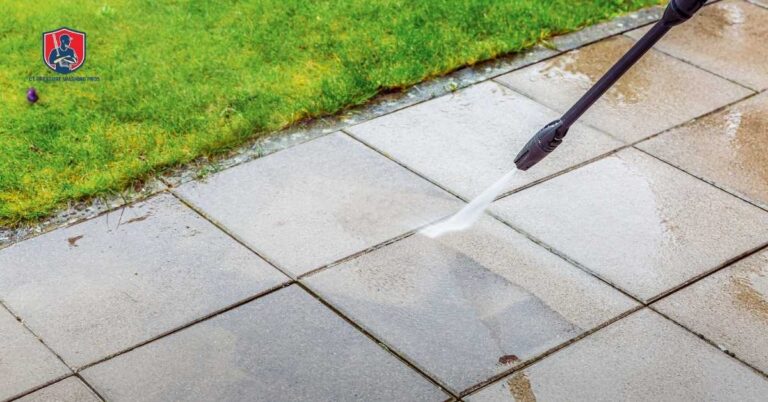
Step 5: Gently Rinse the Roof
- Use a low-pressure garden hose to wash off the cleaning solution.
- Rinse from top to bottom to avoid pushing water under the shingles.
Step 6: Remove Stubborn Moss (If Needed)
- For areas with heavy moss buildup, use a soft brush to loosen it after the cleaner has soaked in.
- Avoid scrubbing too hard—let the solution do the work.
Step 7: Prevent Future Growth
- Install zinc or copper strips at the roof ridge—rainwater will spread these metals and prevent moss regrowth.
- Trim overhanging branches to reduce shade and moisture buildup.
- Clean your roof and gutters regularly to keep debris from accumulating.
Taking these steps will keep your roof in great shape without causing unnecessary wear.
Moss Removal: Best Practices for Long-Term Prevention
Moss may give your roof a rustic look, but it’s quietly damaging your shingles. It traps moisture, speeds up wear, and can even lead to leaks. The key isn’t just removing moss—it’s stopping it from coming back.
Step 1: Clear Loose Debris
- Use a leaf blower or soft brush to remove leaves and twigs.
- Avoid hard-bristle brushes or scraping—this can weaken shingles.
Step 2: Apply a Moss-Killing Solution
- Mix a biodegradable moss cleaner with water in a garden sprayer.
- Spray affected areas evenly, starting at the bottom and working upward.
- Let it sit for 15-20 minutes so it can break down moss roots.
Step 3: Gently Remove Moss
- Use a soft-bristle brush to loosen any remaining moss.
- Work in a downward motion to avoid lifting shingles.
- Rinse with a garden hose using low pressure.
Step 4: Prevent Moss from Growing Back
- Install zinc or copper strips – These metals naturally prevent moss and algae growth. Attach them along the roof ridge, and rainwater will spread the minerals over your roof.
- Trim overhanging branches – Less shade means your roof dries faster, making it harder for moss to grow.
- Clean gutters regularly – Standing water and damp debris encourage moss growth.
- Schedule seasonal roof maintenance – A quick check in spring and fall can help you spot early signs of moss before it spreads.
Moss thrives in damp, shady areas, so keeping your roof dry is the best way to stop it. But there’s more—your gutters also play a big role in protecting your home.
Gutter Cleaning: Keeping Water Flowing and Protecting Your Home
Your gutters do a simple but important job—directing rainwater away from your home. When they’re clogged with leaves, dirt, and debris, water overflows, leading to roof leaks, foundation damage, and even pest problems. Cleaning them regularly keeps water flowing where it should and helps you avoid costly repairs.

Step-by-Step Guide to Safe and Effective Gutter Cleaning
Step 1: Gather Your Tools
- Ladder – Use a sturdy ladder and have someone nearby for safety.
- Gloves – Protect your hands from sharp debris and bacteria.
- Gutter scoop or trowel – Makes removing debris easier.
- Bucket or tarp – Collects debris without making a mess.
- Hose with spray nozzle – Flushes out smaller particles and checks for blockages.
Step 2: Remove Leaves and Debris
- Start near a downspout and work your way across.
- Use a scoop or your hands to remove leaves, twigs, and dirt.
- Drop debris onto a tarp or into a bucket to keep cleanup simple.
Step 3: Flush the Gutters
- Use a garden hose to rinse out any remaining dirt.
- Start at the opposite end of the downspout and work your way toward it.
- Watch for water backing up—this could mean a clog in the downspout.
Step 4: Clear Clogged Downspouts
- If water isn’t flowing freely, check the downspout for blockages.
- Use a hose with high pressure or a plumber’s snake to clear it.
- If necessary, detach the downspout and remove stubborn debris.
Step 5: Check for Damage
- Look for sagging, rust, or cracks in the gutters.
- Make sure they’re properly secured to your house.
- Check that downspouts are directing water at least 3-4 feet away from the foundation.
Step 6: Install Gutter Guards (Optional but Helpful)
- Mesh screens or foam inserts help keep leaves and debris out.
- They reduce the need for frequent cleaning but still require occasional maintenance.
Regular gutter cleaning—at least twice a year—prevents bigger problems like roof leaks and foundation cracks.
How Often Should You Clean Your Roof and Gutters?
Keeping your roof and gutters clean isn’t a one-time job—it’s an ongoing part of home maintenance. But how often should you do it? That depends on your location, weather, and surrounding environment. A home under large trees or in a rainy climate will need more frequent cleaning than one in an open, dry area.
General Cleaning Schedule
- Roof Cleaning: Once a year is usually enough, but homes in humid or wooded areas may need cleaning twice a year to prevent moss and algae buildup.
- Gutter Cleaning: At least twice a year—once in spring and again in fall. If you have overhanging trees, clean them every three to four months.
Signs Your Roof and Gutters Need Immediate Attention
Sometimes, waiting for a scheduled cleaning isn’t enough. Watch for these warning signs:
- Overflowing gutters – Water spilling over the edges during rain is a clear sign of clogs.
- Visible moss or algae on the roof – The earlier you remove it, the less damage it causes.
- Sagging or detached gutters – This means they’re overloaded and may need repairs.
- Pests around the gutters – Birds, rodents, or insects nesting in gutters is a sign of debris buildup.
- Water stains on walls or ceilings – This could mean clogged gutters are causing leaks.
What Affects How Often You Should Clean?
- Trees around your home – More trees mean more leaves and debris in your gutters.
- Climate and weather – Rainy and humid areas promote moss growth, while dry, windy areas bring more dust and debris.
- Roof material – Some materials, like asphalt shingles, hold onto moss and dirt more than others.
Regular maintenance prevents costly damage, but there’s more to it than just cleaning. Small preventative steps—like trimming trees, installing gutter guards, and checking for damage—can save time and effort in the long run. Let’s go over a few final tips to keep your roof and gutters in great shape.
5 Simple Tips to Keep Your Roof and Gutters Clean Longer
Cleaning your roof and gutters regularly is important, but wouldn’t it be better to prevent buildup in the first place? Let’s dive into five tips to keep debris, moss, and clogs from coming back as quickly, making future cleanings much easier.
1. Trim Overhanging Branches
Cut back branches to prevent leaves, twigs, and pests from landing on your roof and clogging gutters.
2. Install Gutter Guards
These filters block debris while allowing water to flow through, reducing how often you need to clean.
3. Add Zinc or Copper Strips
Rainwater spreads these minerals across your roof, stopping moss and algae from growing.
4. Secure Gutters and Downspouts
Make sure gutters are firmly attached and sloped correctly to keep water flowing away from your home.
5. Check Your Roof and Gutters Twice a Year
A quick inspection in spring and fall helps catch problems early before they lead to costly repairs.
A little maintenance goes a long way in protecting your home. But there’s more—let’s wrap up with why all of this matters.
Conclusion: Protect Your Home with Smart Roof and Gutter Care
A clean roof and well-maintained gutters do more than prevent leaks and damage—they help you avoid expensive repairs, extend the life of your home, and even improve energy efficiency. When moss, dirt, and debris pile up, they create bigger problems that could have been prevented with simple upkeep.
The key is consistency. A little effort twice a year can save you thousands in roof replacements and water damage repairs. Trimming trees, using gutter guards, and installing zinc or copper strips are small steps that make a big difference in keeping your home protected.
If DIY maintenance feels like too much, hiring a professional can be a smart investment. A trained eye can catch early signs of damage, ensuring minor issues don’t turn into costly repairs. Whether you clean your roof and gutters yourself or call in an expert, the goal is the same—keeping your home safe, dry, and worry-free.
Now’s the best time to check your roof and gutters. A quick look today could prevent a major headache tomorrow.