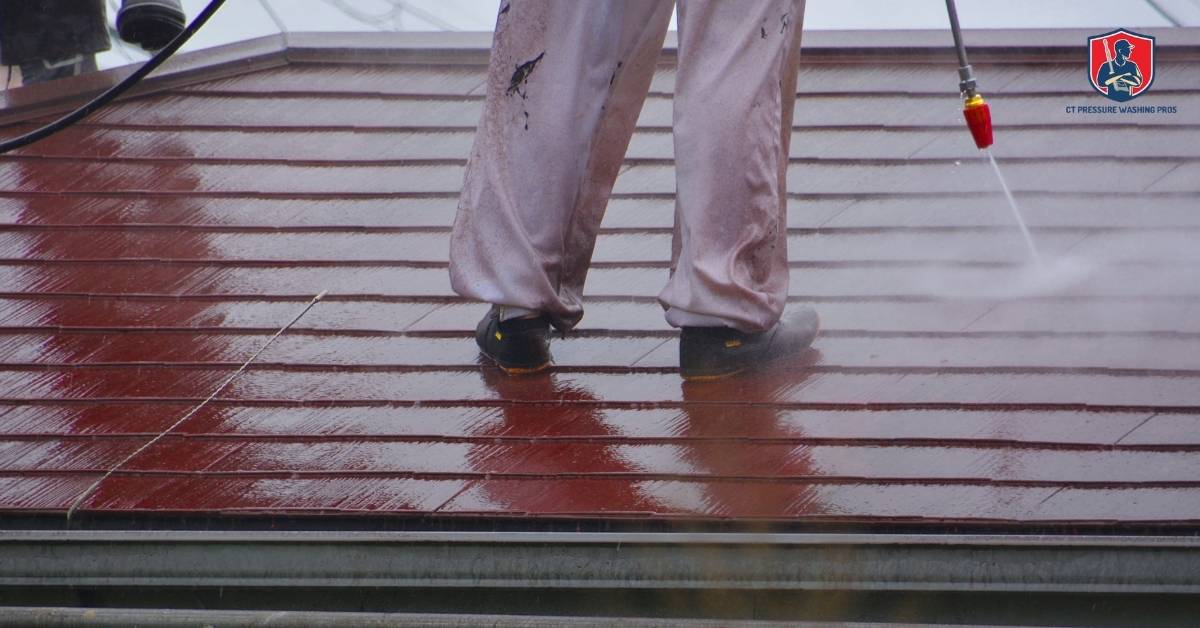
Your roof may look spotless after pressure washing, but that’s exactly when it needs the most attention. The cleaning removes layers of grime, moss, and algae—but it can also leave shingles and coatings slightly exposed to sun, wind, and moisture. Without quick follow-up care, those clean surfaces can deteriorate more quickly than before.
Think of pressure washing as hitting the reset button—it restores your roof’s appearance, but also resets its protection. That’s why post-wash maintenance isn’t optional; it’s what keeps your roof from slipping back into damage or discoloration.
In this guide, we’ll break down the steps to inspect, protect, and preserve your roof after pressure washing—simple steps that can add years to its life and keep your home looking its best.
Table of Contents
Understanding What Happens After Pressure Washing
Pressure washing removes years of dirt, mold, and algae buildup, instantly improving your roof’s appearance. But that deep clean also strips away the thin protective layer that shields shingles or tiles from the elements. Even a safe, professional wash can slightly loosen granules on asphalt shingles and expose minor cracks or seams that were previously hidden under grime.
Once the roof dries, it becomes more vulnerable to sunlight, moisture, and temperature changes. This is normal, but if left untreated, small gaps or weakened spots can lead to early wear, leaks, or discoloration. That’s why post-wash care is so important—it helps restore the roof’s protective barrier and prevents minor issues from turning into expensive repairs.
Another thing many homeowners overlook is how quickly algae and moss can return. The clean surface may look new, but spores left behind can regrow within weeks if moisture remains trapped or nearby trees keep the area shaded. Simple preventive steps, like reapplying a sealant or checking drainage, can make the difference between a roof that stays clean for years and one that needs washing again next season.
Step-by-Step Roof Maintenance After Pressure Washing
Once your roof has been pressure-washed, the real maintenance work begins. Cleaning removes buildup and reveals a fresh surface, but that surface now needs protection. The following steps will help you preserve your roof’s condition, prevent future problems, and make the cleaning last longer. Each step is simple, practical, and focused on keeping your roof strong and weather-resistant without unnecessary effort.
Step 1: Inspect for Any Signs of Damage
After pressure washing, the first thing you should do is check for visible wear or loose materials. Look for cracked, curled, or missing shingles, as well as gaps around flashing, vents, and chimneys. High-pressure cleaning can reveal weak spots that were previously undetectable. If you see dark patches, lifted edges, or fine cracks, address them right away to prevent leaks. A quick visual check from the ground with binoculars is enough, but if something looks questionable, hire a roofer for a closer inspection. Early attention now can save you from expensive water damage later.
Step 2: Reapply Protective Coating or Sealant
Once the roof is clean and dry, reapply a protective sealant to restore the layer that guards against moisture, UV rays, and algae regrowth. For asphalt shingles, a light spray-on coating works well; for tile or metal roofs, use a compatible sealant recommended by the manufacturer. This coating adds an invisible shield that keeps your roof cleaner for longer and reduces fading. Always apply it on a dry, mild day for the best results.
Step 3: Clean the Gutters and Downspouts
Pressure washing often pushes dirt, moss, and shingle granules into the gutters. If they stay clogged, rainwater won’t drain properly and can back up under your roofline. Flush gutters and downspouts thoroughly after washing, ensuring the water flows freely. A clear drainage system keeps your roof dry and prevents standing water from seeping into wood or fascia boards.
Step 4: Check for Algae or Moss Regrowth
Even after cleaning, spores from algae or moss can remain. Keep an eye on shaded or damp areas—they’re the first to show new growth. To prevent it, install zinc or copper strips near the roof ridge. When it rains, these metals release natural elements that stop algae from forming. It’s a simple, low-maintenance solution that protects your roof year-round.
Step 5: Maintain Proper Attic Ventilation
A clean roof is only as healthy as the space beneath it. Check that your attic has proper ventilation and insulation. Poor airflow traps moisture, leading to mold growth and shortened roof life. Make sure vents aren’t blocked and consider adding a vent fan if the attic feels damp or stuffy. Good airflow keeps both the roof and your home interior dry and comfortable.
Preventive Roof Care Tips to Keep It Clean Longer
A clean roof looks great, but keeping it that way takes a little consistency. The goal isn’t to pressure wash every year—it’s to maintain a surface that resists dirt, algae, and wear naturally. These preventive steps extend your roof’s lifespan and reduce how often you’ll need a deep clean.
Schedule Regular Light Cleaning
Instead of waiting until stains or moss return, do light maintenance cleanings once or twice a year. Use a garden hose or low-pressure rinse to wash away dust and debris before they harden or grow. Regular light cleaning prevents buildup and keeps the roof looking fresh without the wear that comes from frequent power washing.
Trim Nearby Trees and Branches
Overhanging branches shade your roof and trap moisture, creating the perfect environment for algae and moss. Trim back any branches that hang directly over your house. This improves sunlight exposure and airflow, helping the roof dry faster after rain and reducing the chance of organic growth.
Apply an Algaecide or Preventive Treatment
After cleaning, you can apply a mild algaecide or roof treatment spray to stop growth before it starts. Choose an eco-friendly formula that won’t damage plants or runoff areas. These treatments usually last several months and work best when applied during dry weather. They’re a simple, low-cost way to protect your investment and keep your roof looking newer between cleanings.
Avoid Common Mistakes
A few bad habits can undo your maintenance efforts. Never walk on a wet roof—it’s slippery and can damage shingles. Avoid using bleach or harsh chemicals; they weaken roofing materials and discolor shingles. And don’t delay small repairs. Even minor cracks or missing shingles can lead to leaks that cost far more to fix later.
With these preventive habits, you’ll spend less time worrying about your roof and more time enjoying a home that looks clean and well-cared-for.
When to Call a Professional
Even with regular care, some roof issues need expert attention. Pressure washing can reveal hidden damage or weak spots that aren’t visible from the ground. Knowing when to call a professional can prevent small problems from turning into expensive repairs.
Signs You Need Expert Help
Call a professional roofer if you notice:
- Loose or missing shingles – often caused by high-pressure cleaning or old age.
- Peeling or cracked sealant – a sign that your roof’s moisture barrier is weakening.
- Pooling water or slow drainage may point to clogged gutters or sagging spots.
- Dark streaks or moss returning quickly – usually means spores weren’t fully removed or moisture is trapped.
- Water stains in your attic – early evidence of leaks or poor ventilation.
Benefits of Professional Maintenance
Bringing in a roofing expert ensures:
- Accurate inspections – they can spot early structural damage or hidden weak points.
- Safe service – professionals use proper equipment and safety gear to avoid damage or accidents.
- Proper coating and sealing – ensures even application and longer protection.
- Warranty protection – many roof warranties require regular professional checks.
- Cost savings – fixing a small issue early is cheaper than replacing entire sections later.
How Often to Schedule Inspections
To keep your roof in good shape:
- Annually: For most homes, schedule a professional inspection once a year after harsh weather seasons.
- Every six months: If you live in a humid or heavily wooded area.
- After extreme weather: Heavy rain, hail, or storms can loosen shingles or damage flashing.
By knowing when to call a professional, you keep your roof strong, safe, and clean all year long. Next, we’ll finish with a short conclusion that brings all these maintenance steps together.
Conclusion
Maintaining your roof after pressure washing isn’t complicated—it’s about consistency and smart follow-up. The cleaning gives your home a fresh look, but what truly protects your investment is how you care for the roof afterward. Simple actions like inspecting for minor damage, applying a sealant, and keeping gutters clear go a long way in preventing costly repairs.
A clean roof doesn’t stay that way by accident. Regular light cleaning, trimming nearby trees, and scheduling inspections help extend its life and keep your home safe from leaks and decay. Whether you handle small upkeep yourself or hire a professional for yearly checks, staying proactive ensures your roof remains strong, clean, and dependable for years.
In short, pressure washing refreshes your roof, but maintenance preserves it. A few mindful steps today can keep your home protected and looking its best through every season.
